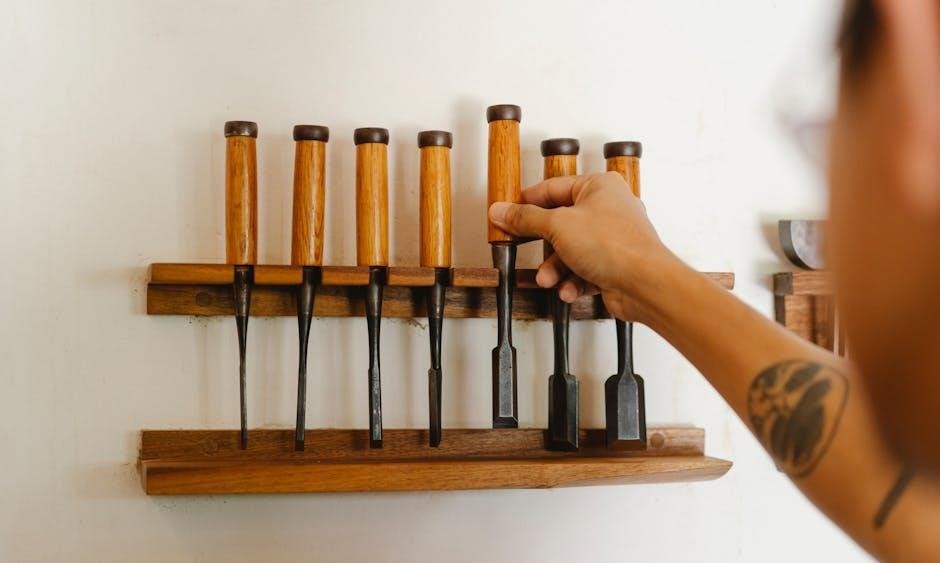
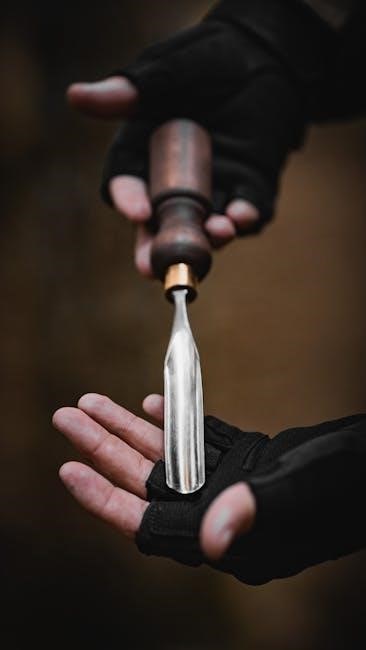
Maintaining sharp chisels is crucial for woodworking precision, and honing guides offer repeatable, accurate sharpening․
These tools assist in consistently achieving the desired bevel angle,
especially beneficial for beginners and those working with valuable steel․
The Importance of a Sharp Chisel
A sharp chisel is paramount for clean, precise cuts in woodworking․ Dull chisels require excessive force, leading to splintering, tear-out, and ultimately, compromised project quality․ Sharp tools enhance control, reduce fatigue, and improve the overall enjoyment of the craft․
Furthermore, maintaining a keen edge extends the life of your chisels․ The need to apply less pressure minimizes wear and tear on the steel․ Investing in sharpening, particularly with aids like honing guides, protects your investment in quality tools․
Sharpness also directly impacts safety, as a dull chisel is more prone to slipping․
Why Use a Honing Guide?
Honing guides eliminate the guesswork from chisel sharpening․ Achieving a consistent angle freehand demands significant skill and practice․ Guides ensure repeatability, crucial for maintaining a uniform bevel across all your chisels․ This is especially valuable when working with A2 steel, where precision is key․
They stabilize the tool, preventing rocking and ensuring even material removal; For beginners, honing guides provide a learning aid, building muscle memory for the correct sharpening technique․ Even experienced woodworkers benefit from the speed and accuracy they offer, particularly when restoring heavily damaged edges․
Types of Honing Guides
Honing guides come in various designs, including roller-based, wheel-based (like the Work Sharp 3000), and universal models․ Each type offers unique advantages
for chisel sharpening and blade alignment․
Roller-Based Honing Guides
Roller-based honing guides, such as the Primadian system, utilize multiple rollers – both short and long – to provide exceptional stability during the sharpening process․ This design is particularly effective at maintaining a consistent and perfectly square edge on both chisels and plane blades․
The rollers minimize wobble and ensure the blade remains firmly secured within the guide, even during extended sharpening sessions․ These guides often support a broad range of sharpening angles, including common settings like 15, 20, 25, 30, 35, 40, and 45 degrees, and frequently include an angle gauge for precise verification of existing bevels․
Wheel-Based Honing Guides
Wheel-based honing guides, exemplified by the Work Sharp 3000, employ a wheel system to guide the chisel or plane iron across the sharpening stone․ These guides are praised for their simplicity and effectiveness in achieving consistently sharp results, even for those new to sharpening techniques․
The Work Sharp 3000, in particular, features a chisel guide that positions the tool beneath the sharpening wheel, allowing for controlled and repeatable passes․ Users report excellent performance with A2 steel plane blades and chisels, achieving a razor-sharp edge with minimal effort and a decade of reliable use․
Universal Honing Guides
While not explicitly categorized as “universal,” many honing guides strive for broad compatibility․ The ATLIN Honing Guide exemplifies this, designed to accommodate chisels ranging from 1/8 to 1-7/8 inches in width and plane irons from 1-3/8 to 3-1/8 inches․ This self-centering and fully adjustable design aims to minimize the need for multiple guides;
These guides often prioritize adaptability, seeking to fit a wide array of tool sizes․ However, achieving optimal stability and squareness can sometimes be a trade-off with such broad compatibility․ Careful adjustment and secure clamping are crucial for effective sharpening․
Key Features to Consider
Essential features include adjustable angle settings, compatibility with chisel and plane iron sizes, and overall stability․
Squareness is paramount for achieving a clean, effective cutting edge during woodworking․
Adjustable Angle Settings
The ability to precisely adjust the sharpening angle is a cornerstone of a versatile honing guide․ Different chisels and woodworking tasks demand varying bevel angles for optimal performance․
Guides like the Primadian system excel here, offering support for a broad spectrum of angles – 15, 20, 25, 30, 35, 40, and even 45 degrees․
This flexibility is invaluable when restoring existing bevels or customizing them for specific purposes․ An integrated angle gauge, as found in some models, further enhances accuracy by allowing verification of the blade’s current bevel․
Having this control ensures consistent, repeatable results, regardless of the chisel or plane iron being sharpened․

Chisel and Plane Iron Compatibility
A honing guide’s usefulness is significantly impacted by its ability to accommodate a range of tool sizes․ Many guides, like the ATLIN Honing Guide, are designed with adjustability in mind․ This particular model effectively handles chisels from 1/8 to 1-7/8 inches in width, and plane irons spanning 1-3/8 to 3-1/8 inches․
Self-centering features are also beneficial, ensuring secure and stable positioning of the blade within the guide․ Compatibility isn’t limited to standard sizes; some guides can adapt to Japanese chisels or wider plane blades, making them a versatile addition to any workshop․
Stability and Squareness
Achieving a perfectly square edge is paramount in chisel sharpening, and a honing guide’s stability directly influences this outcome․ Systems like the Primadian Honing Guide utilize double rollers – both short and long – to provide exceptional stabilization during the honing process․
The OSKOOL honing guide employs two wheels to maintain verticality of the tool’s edges, offering consistent support․ Preventing wobble or movement is crucial; a stable guide minimizes the risk of rounding the corners and ensures a truly square, sharp edge, vital for precise woodworking․
Popular Honing Guide Models
Several honing guides stand out for their performance and features․ The Work Sharp 3000, Primadian, ATLIN, and OSKOOL guides are frequently recommended by woodworkers for reliable sharpening․
Work Sharp 3000
The Work Sharp 3000 is a popular choice, often praised for its ease of use and consistent results․ Many woodworkers, even experienced craftsmen, recommend it as an “idiot-proof” option for achieving perfectly sharpened chisels․
Its design incorporates a chisel guide that operates under a rotating wheel, providing a stable platform for honing․ Users report excellent performance over extended periods, with some having reliable results for a decade or more․ This model excels at delivering precise sharpening every time, making it a valuable asset in any woodworking shop․
Primadian Honing Guide System
The Primadian Honing Guide System stands out with its innovative double roller design – utilizing both short and long rollers to stabilize chisels and plane blades during the sharpening process․ This unique feature ensures a consistently square edge, a critical aspect of precision woodworking․
It supports a broad range of sharpening angles, including 15, 20, 25, 30, 35, 40, and 45 degrees, and includes an angle gauge for verifying existing bevels․ This versatility makes it suitable for various tools and sharpening preferences, offering a high degree of control․
ATLIN Honing Guide
The ATLIN Honing Guide is recognized for its adaptability and user-friendly design, making it a popular choice for woodworkers․ This sharpening jig is self-centering and fully adjustable, accommodating chisels ranging from 1/8 to 1-7/8 inches in width․ It also supports plane irons spanning 1-3/8 to 3-1/8 inches, offering broad compatibility․
Its adjustability allows for precise control over the sharpening angle, catering to different tool geometries and user preferences․ The ATLIN guide aims to simplify the sharpening process, delivering consistent results for both beginners and experienced craftspeople․
OSKOOL Honing Guide

The OSKOOL Honing Guide distinguishes itself with a design focused on stability during the sharpening process․ Featuring two wheels, this guide provides enhanced support, helping to maintain both the front edge and the sides of the tool in a vertical position․ This dual-wheel system minimizes rocking and ensures consistent contact with the sharpening stone․
This stable support is particularly valuable for achieving a square edge, a critical aspect of chisel performance․ The OSKOOL guide aims to simplify sharpening, offering reliable results for woodworkers seeking precision and ease of use․
Setting Up Your Honing Guide
Proper setup is key to effective sharpening․ Securely clamp the chisel into the guide, ensuring it’s centered and stable․ Then, carefully adjust the sharpening angle to match your preference․
Securing the Chisel
The foundation of successful sharpening lies in firmly securing the chisel within the honing guide․ Most guides, like the ATLIN Honing Guide, feature a self-centering mechanism to accommodate varying chisel widths – typically ranging from 1/8 to 1-7/8 inches․ Ensure the chisel is seated flush against the guide’s base and that the clamping knob is tightened sufficiently․
Insufficient clamping can lead to movement during sharpening, compromising accuracy․ Conversely, over-tightening might damage the chisel or the guide itself․ A stable hold is paramount for consistent results, especially when using harder steels like A2, where precision is vital․ Double-roller systems, such as those found in the Primadian guide, enhance stability further․
Adjusting the Sharpening Angle
Precisely setting the sharpening angle is critical for optimal chisel performance․ Honing guides, like the Primadian system, offer pre-set angles – 15, 20, 25, 30, 35, 40, and 45 degrees – catering to diverse woodworking needs․ Utilize the included angle gauge to verify the existing bevel on your chisel, ensuring you match or slightly adjust it․
Some guides allow for micro-adjustments, providing fine-tuning capabilities․ Consistent angle maintenance is key; the guide’s stability prevents unwanted shifts during the sharpening process․ Remember, a steeper angle increases durability, while a shallower angle enhances sharpness․
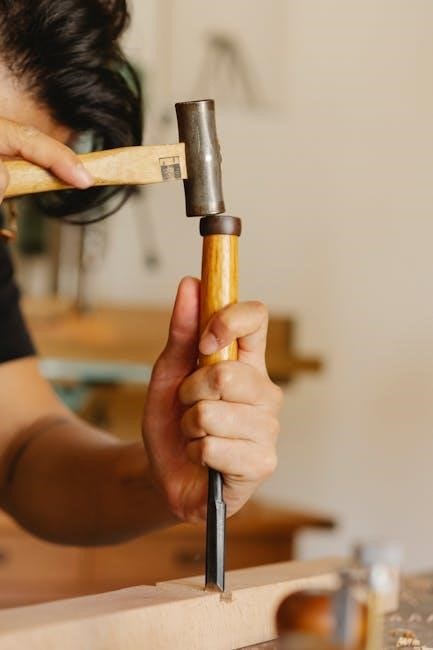
Sharpening Process with a Honing Guide
Utilize water stones or diamond stones with your honing guide for effective sharpening․ Maintain consistent, even pressure and a steady angle throughout the process for optimal results․
Using Water Stones
Water stones are a popular choice for honing chisels, offering a fine abrasive surface that creates a very sharp edge․ Before starting, soak the water stone in water for the recommended time, ensuring it’s fully saturated․
With the chisel secured in the honing guide, gently draw the blade across the water stone, maintaining consistent pressure and the pre-set angle․ Keep the stone lubricated with water throughout the process․ Work through progressively finer grits, starting with a coarser grit to remove material and then moving to finer grits for polishing․
Regularly flatten your water stones to maintain a level surface for consistent sharpening․ This ensures even contact and prevents uneven wear on your chisel’s edge․
Using Diamond Stones

Diamond stones provide a fast and efficient sharpening experience, requiring no soaking like water stones․ They are available in various grits, allowing for both aggressive material removal and fine polishing․ When using a honing guide with diamond stones, maintain a consistent angle and light pressure․
Begin with a coarser grit to establish the bevel, then progress to finer grits for refinement․ Diamond stones cut quickly, so avoid excessive pressure to prevent overheating the steel․
Periodically clean the diamond stone with a diamond stone cleaning pad to remove metal swarf and maintain its cutting efficiency; This ensures a consistently sharp edge on your chisels․
Maintaining a Consistent Angle
The core benefit of a honing guide is angle consistency․ Throughout the sharpening process, ensure the guide remains firmly seated against the stone․ Avoid lifting or shifting the guide during each pass, as this introduces inconsistencies․
Slow, deliberate strokes are key; rushing can compromise accuracy․ Regularly check the angle with a bevel gauge to confirm it hasn’t drifted․
Pay attention to the feel – a smooth, even glide indicates proper contact․ Maintaining this consistency is paramount for achieving a razor-sharp, square edge on your chisels, maximizing their performance․
Troubleshooting Common Issues
Squareness and chatter are frequent challenges․ Ensure the chisel is securely clamped and the guide is stable; Adjust pressure and stone selection to minimize vibration․
Achieving Squareness
Maintaining a perfectly square chisel edge is paramount for clean, precise cuts․ A honing guide significantly aids this, but proper setup is vital․ Verify the chisel is seated correctly within the guide, ensuring even pressure across the blade․ Double-rollers, like those found in the Primadian system, enhance stability and minimize rocking․

Regularly check the guide’s own squareness using a reliable square tool․ Minor adjustments to the guide’s clamping mechanism can correct deviations․ Consistent, light pressure during honing, combined with a flat stone, will further promote squareness․ Addressing any chatter or vibration is also key, as these can introduce rounding to the edge․
Preventing Chatter
Chatter during honing creates an uneven, undesirable edge, defeating the purpose of using a guide․ Several factors contribute to this issue․ Ensure the chisel is securely clamped within the honing guide; any looseness will amplify vibrations․ A clean, flat sharpening stone is essential – irregularities cause bouncing․
Applying consistent, moderate pressure is crucial; excessive force exacerbates chatter․ Using a lubricant, like water with water stones, reduces friction and dampens vibrations․ If chatter persists, check the guide itself for stability and consider a slower honing speed․ A stable setup minimizes unwanted movement, leading to a smoother, sharper edge․
Alternatives to Honing Guides
Freehand sharpening demands skill and practice, while nano hones offer precision for bevel adjustments․ Both provide alternatives to guides,
catering to different skill levels and sharpening needs․
Freehand Sharpening
Freehand sharpening represents the traditional method, relying entirely on the woodworker’s skill and feel to maintain a consistent angle․ This technique requires significant practice to master, demanding a keen eye and steady hand to achieve a truly sharp and square edge․ While it eliminates the need for specialized tools like honing guides, the learning curve is steep․

Experienced woodworkers often prefer freehand sharpening for its flexibility and control, allowing for nuanced adjustments based on the specific chisel and wood being used․ However, for beginners, or those seeking repeatable results, the inherent challenges can be frustrating․ Achieving consistent sharpness takes time, patience, and a dedication to honing one’s technique․
Nano Hone
The Nano Hone offers a unique alternative to traditional honing guides, particularly for adjusting bevels on Japanese chisels․ This specialized tool utilizes a very fine abrasive surface, allowing for precise and controlled metal removal without the clamping mechanism of a standard guide․ It’s favored by woodworkers who prefer a more direct connection to the sharpening process․
Unlike guides, the Nano Hone doesn’t rigidly fix the chisel’s angle; instead, it relies on the user’s skill to maintain consistency․ It’s often used after initial sharpening with stones to refine the bevel and achieve a razor-sharp edge․ Some woodworkers find it ideal for delicate adjustments and preserving the geometry of high-quality steel․
Maintaining Your Honing Guide
Regular cleaning and lubrication are essential for a honing guide’s longevity․ Inspecting for wear on rollers or adjustment mechanisms ensures continued accuracy and reliable performance․
Cleaning and Lubrication
Consistent cleaning is paramount for optimal honing guide function․ After each use, remove any metal filings or abrasive residue from the guide’s surfaces, particularly around the rollers and adjustment points․ A soft brush or compressed air works effectively․
Lubrication minimizes friction and ensures smooth operation․ Apply a small amount of light machine oil to the moving parts – rollers, screws, and sliding surfaces․ Avoid excessive oil, as it can attract debris․ Periodically check and tighten any loose screws or bolts to maintain stability and prevent unwanted movement during sharpening․
Proper maintenance extends the life of your guide, guaranteeing consistent and accurate sharpening results for years to come․
Inspecting for Wear
Regular inspection is vital to ensure your honing guide maintains its precision․ Closely examine the rollers for any signs of wear, such as flat spots or cracks, as these can compromise the chisel’s stability during sharpening․ Check the guide’s body for bending or warping, which can affect the sharpening angle․
Pay attention to the adjustment mechanisms; ensure screws turn smoothly and securely․ Worn or damaged components should be replaced promptly to maintain accuracy․ Inspect the chisel clamping mechanism for looseness or damage․
Proactive inspection prevents inaccurate sharpening and prolongs the life of your valuable tools․
Achieving Razor-Sharp Chisels
Employing a honing guide dramatically simplifies chisel sharpening, delivering consistently sharp results for both novice and experienced woodworkers․ Whether opting for a roller-based, wheel-based, or universal guide, the key lies in proper setup and technique․
Investing in a quality honing guide, like the Work Sharp 3000 or Primadian system, ensures repeatable accuracy and preserves the longevity of your chisels․ Remember consistent angle maintenance and regular tool inspection are paramount․
Ultimately, a sharp chisel enhances precision, efficiency, and enjoyment in all woodworking endeavors․