
Aeropress Coffee Instructions: A Comprehensive Guide
Aeropress brewing offers a versatile and portable coffee experience, blending simplicity with control. This guide details setup, brewing, and maintenance, ensuring a consistently delicious cup.
What You Need to Brew with an Aeropress

To embark on your Aeropress journey, gathering the essential tools is the first step towards exceptional coffee. Naturally, you’ll require the Aeropress itself, including the chamber, plunger, and filter cap.
Aeropress paper filters are crucial for a clean brew, though reusable metal filters are a popular eco-friendly alternative. A quality coffee grinder – manual or electric – is vital for achieving the correct particle size. Freshly ground beans are always best!
You’ll also need your favorite coffee beans, of course. A kettle for heating water to the ideal temperature is essential, and a mug or carafe to brew into completes the setup. Measuring spoons or a scale ensure consistent coffee-to-water ratios. Finally, stirring implements, like a small spoon or paddle, are helpful for optimal extraction.
Optional, but beneficial, additions include a timer to monitor brew time and a funnel for easier coffee ground addition.
Measure and Grind Your Coffee Beans
Precise measurement and grinding are foundational to a superb Aeropress brew. Begin by determining your desired coffee strength and volume. A common starting point is 15-17 grams of coffee for a single cup (approximately 200-240ml of water). Using a scale provides the most accurate measurement, but spoons can suffice.

Grind size significantly impacts the final flavor. For Aeropress, a medium-fine grind is generally recommended – finer than for a drip machine, but coarser than espresso. This allows for sufficient extraction within the relatively short brew time.
The new Aeropress Manual Grinder can help achieve the perfect grind size for various brewing methods. Experimentation is key! A finer grind yields a stronger, more intense flavor, while a coarser grind results in a lighter, cleaner cup.
Always grind your beans immediately before brewing to preserve their aroma and freshness. Pre-ground coffee loses flavor rapidly. Consistent grind size is also crucial for even extraction.
Preparing the Aeropress for Brewing
Begin by disassembling your Aeropress. You’ll need the chamber, plunger, filter cap, and a paper filter. Rinse the chamber with hot water; this pre-heats it, maintaining a stable brewing temperature. Place a paper filter into the filter cap and rinse it thoroughly with hot water as well. This eliminates any papery taste that could affect your coffee.
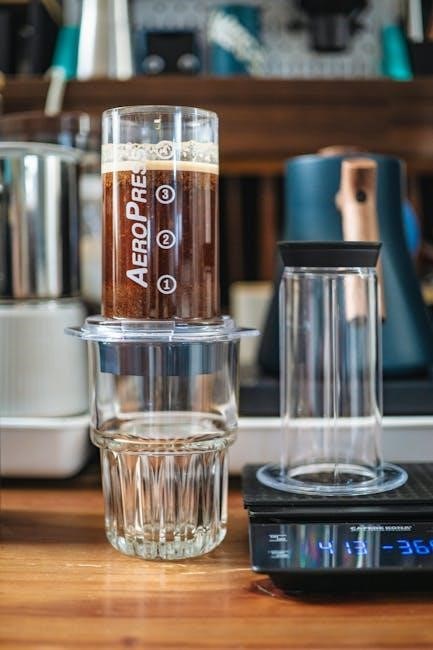
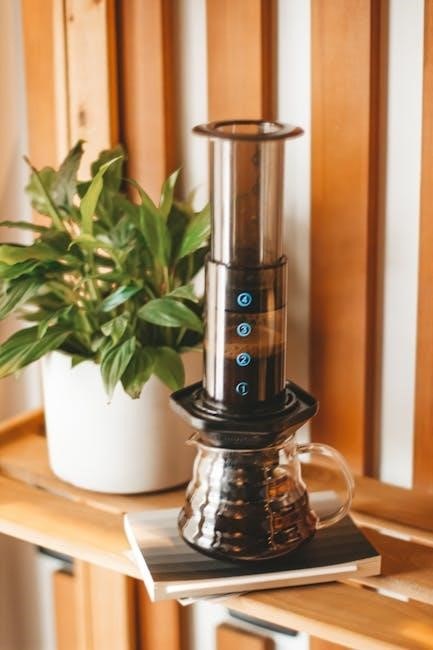
Screw the filter cap onto the chamber securely. Now, decide whether you’ll be using the standard or inverted method – this impacts the next steps. For the standard method, place the Aeropress directly onto your mug.
If opting for the inverted method, insert the plunger a short way into the chamber and flip the Aeropress upside down, resting it securely on the plunger. Ensure the seal is tight to prevent leaks during brewing.
Having all components ready streamlines the brewing process, allowing you to focus on precise timing and technique for optimal results;
Adding Coffee Grounds to the Chamber
With the Aeropress prepared – either standard or inverted – it’s time to add your freshly ground coffee. The amount of coffee you use will depend on your desired strength and the coffee-to-water ratio you prefer, but a good starting point is around 15-17 grams for a single cup.
Carefully pour the grounds into the chamber, ensuring they are evenly distributed. A small funnel can be helpful to avoid spills. Consider the grind size; a medium-fine grind is generally recommended for the Aeropress, similar to table salt.
However, experimentation is key to finding what suits your taste. Finer grinds will result in a stronger, more concentrated brew, while coarser grinds will yield a lighter, cleaner cup. Gently tap the side of the chamber to settle the grounds, creating a level bed for even water saturation.
This initial step sets the foundation for a flavorful and balanced Aeropress coffee.
Adding Water: Temperature and Amount
Now, carefully add hot water to the Aeropress chamber, over the coffee grounds. Water temperature is crucial; generally, 175-185°F (80-85°C) is recommended. Boiling water can scorch the grounds, leading to a bitter taste, while cooler water may result in under-extraction and a sour brew.
The amount of water also impacts the final result. A typical starting point is around 200-220ml for a standard cup, but adjust this based on your preference and the coffee-to-water ratio. Pour the water slowly and deliberately, ensuring all the grounds are saturated.
Aim for a consistent pour to achieve even extraction. Observe the “bloom” – the initial release of gases as the water interacts with the coffee. This indicates freshness and prepares the grounds for optimal flavor development.
Precise water temperature and volume are vital for unlocking the full potential of your Aeropress brew.
Placing the Plunger and Initial Wait Time
After adding the water, gently insert the Aeropress plunger into the chamber, creating an airtight seal. Do not press down yet! The plunger serves to contain the brewing coffee and build pressure for a smooth extraction. Ensure the plunger is inserted far enough to create a secure fit, but avoid forcing it.
Now, allow for an initial wait time, often referred to as the “bloom” phase, though it continues beyond the initial bloom. A wait of approximately 30-60 seconds allows the coffee grounds to degas and fully saturate. This step is crucial for releasing trapped carbon dioxide, resulting in a cleaner, more flavorful cup.
During this wait, you might observe bubbling – this is a good sign! It indicates the coffee is actively releasing gases. Resist the urge to stir during this initial phase; let the process unfold naturally.
Patience during this stage significantly enhances the overall brewing experience with your Aeropress.
Stirring the Coffee and Water Mixture
Following the initial wait time, it’s time to gently stir the coffee and water mixture within the Aeropress chamber. Use a small paddle, spoon, or even the Aeropress stirrer (if available) to ensure all the coffee grounds are thoroughly saturated. Avoid vigorous stirring, as this can lead to over-extraction and a bitter taste.
A gentle, circular motion for approximately 10-15 seconds is usually sufficient. The goal is to create a homogenous slurry, where all the grounds are evenly exposed to the water. This ensures a consistent extraction across all particles, maximizing flavor potential.
Pay attention to any dry clumps of coffee remaining at the bottom of the chamber; these need to be broken up and incorporated into the mixture. Consistent saturation is key to a balanced brew.
Proper stirring is a subtle but vital step in achieving optimal flavor with your Aeropress, setting the stage for a successful plunge.
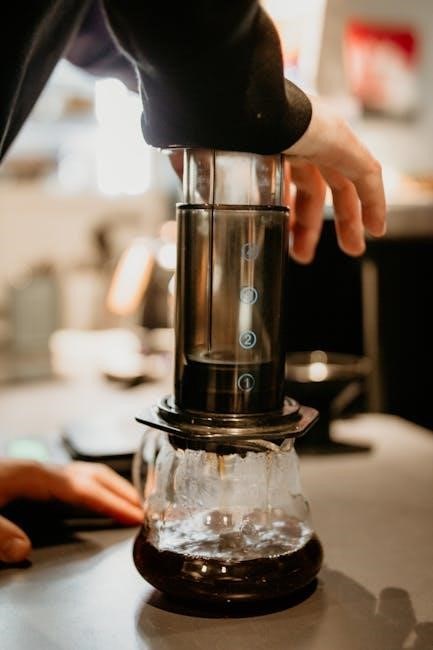
The Plunging Process: Technique and Pressure

The plunge is the defining action of the Aeropress brewing method. Begin by placing the plunger directly on top of the coffee and water mixture, ensuring a good seal. Apply slow, steady, and even pressure. Avoid rushing this step, as it’s crucial for a clean extraction.

Resist the urge to force the plunger down; a smooth, controlled descent is preferred. You should feel some resistance, but it shouldn’t be excessive. If it’s too difficult, your grind might be too fine. Aim for a plunge time of around 20-30 seconds.
Listen for a hissing sound as the air is expelled – this indicates you’ve reached the end of the extraction. Stop plunging once you hear the hiss, preventing any bitter sediment from being forced through.
Consistent pressure and a controlled pace are key to a smooth and flavorful Aeropress brew. Mastering the plunge unlocks the full potential of this versatile device.
Brewing Methods: Standard vs. Inverted
The Aeropress offers two primary brewing methods: standard and inverted. The standard method involves assembling the Aeropress normally, placing a filter in the cap, and brewing directly into your cup. It’s quick and straightforward, ideal for beginners.
The inverted method, however, flips the Aeropress upside down. You place the plunger in a bit, add coffee and water, stir, and then carefully flip it onto your cup before plunging. This prevents dripping during the brewing process, allowing for a longer steep time and greater control.
Many Aeropress enthusiasts prefer the inverted method for its flexibility. It minimizes premature extraction and allows for experimentation with different brew times. However, it requires a bit more caution to avoid spills during the flip.
Both methods yield excellent results; the best choice depends on your preference and desired level of control. Experiment with both to discover your ideal Aeropress brewing style.
Adjusting Grind Size for Different Brews

Grind size significantly impacts your Aeropress coffee. Finer grinds increase surface area, leading to faster extraction and a bolder, more intense flavor. However, too fine a grind can result in over-extraction and bitterness.
Coarser grinds, conversely, extract slower, producing a cleaner, brighter cup. But, if the grind is too coarse, you risk under-extraction and a weak, sour taste. The ideal grind size depends on your brewing method and desired outcome.
For shorter brew times, a finer grind is generally preferred. Longer brew times benefit from a coarser grind. The new Aeropress Manual Grinder allows precise adjustments for espresso, pour-over, and Aeropress brewing.
Experimentation is key! Start with a medium-fine grind and adjust based on your taste. If your coffee is bitter, coarsen the grind. If it’s sour, fine it up. Finding the sweet spot unlocks the full potential of your beans.
Water Temperature’s Impact on Flavor
Water temperature is a crucial, often overlooked, element in Aeropress brewing. It directly influences the extraction of flavors from your coffee grounds. Generally, hotter water extracts more compounds, resulting in a bolder, more robust cup.
However, excessively hot water (boiling – 212°F/100°C) can scorch the grounds, leading to bitterness. A temperature range of 175-185°F (80-85°C) is often recommended as a starting point for optimal flavor.
Lower temperatures, around 175°F, are ideal for lighter roasts, emphasizing delicate floral and fruity notes. Darker roasts can handle slightly higher temperatures, up to 185°F, to fully develop their chocolatey and nutty profiles.
Allowing boiling water to sit for a minute or two before pouring helps achieve the desired temperature. Experimenting within this range allows you to fine-tune the flavor profile to your preference, unlocking the full potential of your coffee beans.
Coffee-to-Water Ratio: Finding Your Preference
The Aeropress’s versatility extends to its coffee-to-water ratio, allowing for personalized strength and flavor. A standard starting point is a 1:15 ratio – for example, 15 grams of coffee to 225 grams of water. However, this is merely a guideline.
For a stronger, more concentrated brew, decrease the water amount (e.g., 15 grams coffee to 180 grams water). This is ideal for those who enjoy a robust, espresso-like experience or plan to dilute with hot water for an Americano-style drink.
Conversely, increasing the water ratio (e.g., 15 grams coffee to 270 grams water) yields a milder, more approachable cup. Experimentation is key! Keep a brewing journal to track your ratios and resulting flavors.
Consider the coffee bean’s origin and roast level. Lighter roasts often benefit from a slightly higher ratio, while darker roasts can handle a lower one. Finding your sweet spot is a journey of taste and refinement.
Cleaning and Maintaining Your Aeropress
Proper Aeropress cleaning ensures longevity and prevents stale coffee oils from impacting flavor. Immediately after each brew, eject the spent coffee puck by pressing the plunger fully through the chamber. Rinse the chamber and plunger thoroughly with warm water.
Disassemble the Aeropress – separate the plunger, seal, and chamber. Wash each component with mild dish soap and warm water. Pay close attention to the seal, ensuring all coffee residue is removed. Avoid abrasive cleaners, as they can damage the plastic.
Periodically, a deeper clean is beneficial. Soak all parts in a solution of warm water and a coffee cleaning tablet (or a mild vinegar solution) for several hours. Rinse thoroughly afterwards.
Inspect the rubber seal regularly for wear and tear. Replacements are readily available. Proper maintenance guarantees consistent performance and a delightful brewing experience for years to come.
Troubleshooting Common Aeropress Issues
Stuck Plunger: If the plunger is difficult to press, the coffee grounds are likely too fine or compacted. Try a coarser grind or reduce the amount of coffee used. Ensure the chamber is properly aligned.
Leaking Aeropress: Check the rubber seal for damage or improper seating. Ensure the chamber is securely screwed onto the filter cap. Avoid overfilling the chamber, as this can cause leaks during plunging.
Weak Coffee: Increase the coffee-to-water ratio, use a finer grind, or increase the brewing time. Water temperature also plays a role; ensure it’s within the optimal range.
Bitter Coffee: Reduce brewing time, use a coarser grind, or lower the water temperature. Over-extraction leads to bitterness. Experiment with different variables to find your sweet spot.
Difficult Puck Ejection: Ensure grounds aren’t excessively fine. A gentle tap on the Aeropress can help dislodge the puck. Consistent cleaning prevents buildup that hinders ejection.
Exploring Advanced Aeropress Techniques
Bypass Brewing: Brew a concentrated Aeropress coffee and then dilute it with hot water to achieve your desired strength. This allows for precise control over the final cup’s intensity.
Multiple Plunges: Instead of a single, continuous plunge, try pulsing the plunger several times. This can enhance extraction and create a more complex flavor profile.
Pre-Infusion: Add a small amount of water to the grounds and let it bloom for 30 seconds before adding the remaining water. This degasses the coffee, improving flavor.
Adjusting Water Flow: Experiment with different pouring techniques – slow and steady versus quick and turbulent – to influence extraction. Observe the impact on taste.
Grind Distribution: Utilize a WDT (Weiss Distribution Technique) tool to break up clumps and evenly distribute grounds in the chamber, promoting consistent extraction. Explore different recipes online and adapt them to your preferences!
Resources for Further Learning and Recipes
Aeropress Official Website: aeropress.com provides official instructions, FAQs, and a community forum for enthusiasts. It’s a great starting point for all things Aeropress.
World Aeropress Championship: Explore past competition recipes and techniques at worldaeropresschampionship.com. These showcase innovative brewing methods.
YouTube Channels: Channels like James Hoffmann and Sprometheus offer detailed Aeropress tutorials and brewing guides. Search “Aeropress” on YouTube for a wealth of content.
Coffee Blogs & Websites: Websites like Perfect Daily Grind and Sprudge feature articles and recipes dedicated to Aeropress brewing. Discover new techniques and flavor combinations.
Online Communities: Reddit’s r/Aeropress and various coffee forums are excellent places to ask questions, share recipes, and connect with fellow Aeropress users. Experiment and enjoy the journey!